Anatomical Illustration • 2021
Coronal Section of Knee Joint.
STORY
The aim of this project is show the relationship between the superficial and deep layers of the posterior compartment of the left knee from a non-traditional viewpoint.
OVERVIEW
FORMAT
Text illustration, print
TOOLS
Photoshop, Illustrator, ZBrush,
Autodesk Maya
CLIENT
Shelley Wall, Dave Mazierski, Dr. Anne Agur, University of Toronto
PROCESS WORK
RESEARCH
For this assignment, I wanted to depict a medial view of the knee as I had previously found that most atlas illustrations are of the lateral view.
In the beginning stages, I considered depicting a “cake slice” cross-section of the coronal, sagittal, and axial planes seen from anterior-medial view. At this point I intended for the popliteal vessels and the tibial nerve to be intact and visible in the cut.
In my initial sketch I was also going to draw the femur, tibia, and fibula seen through the other leg, but ultimately this idea was scrapped as it would take attention away from the main illustration.
Ideation
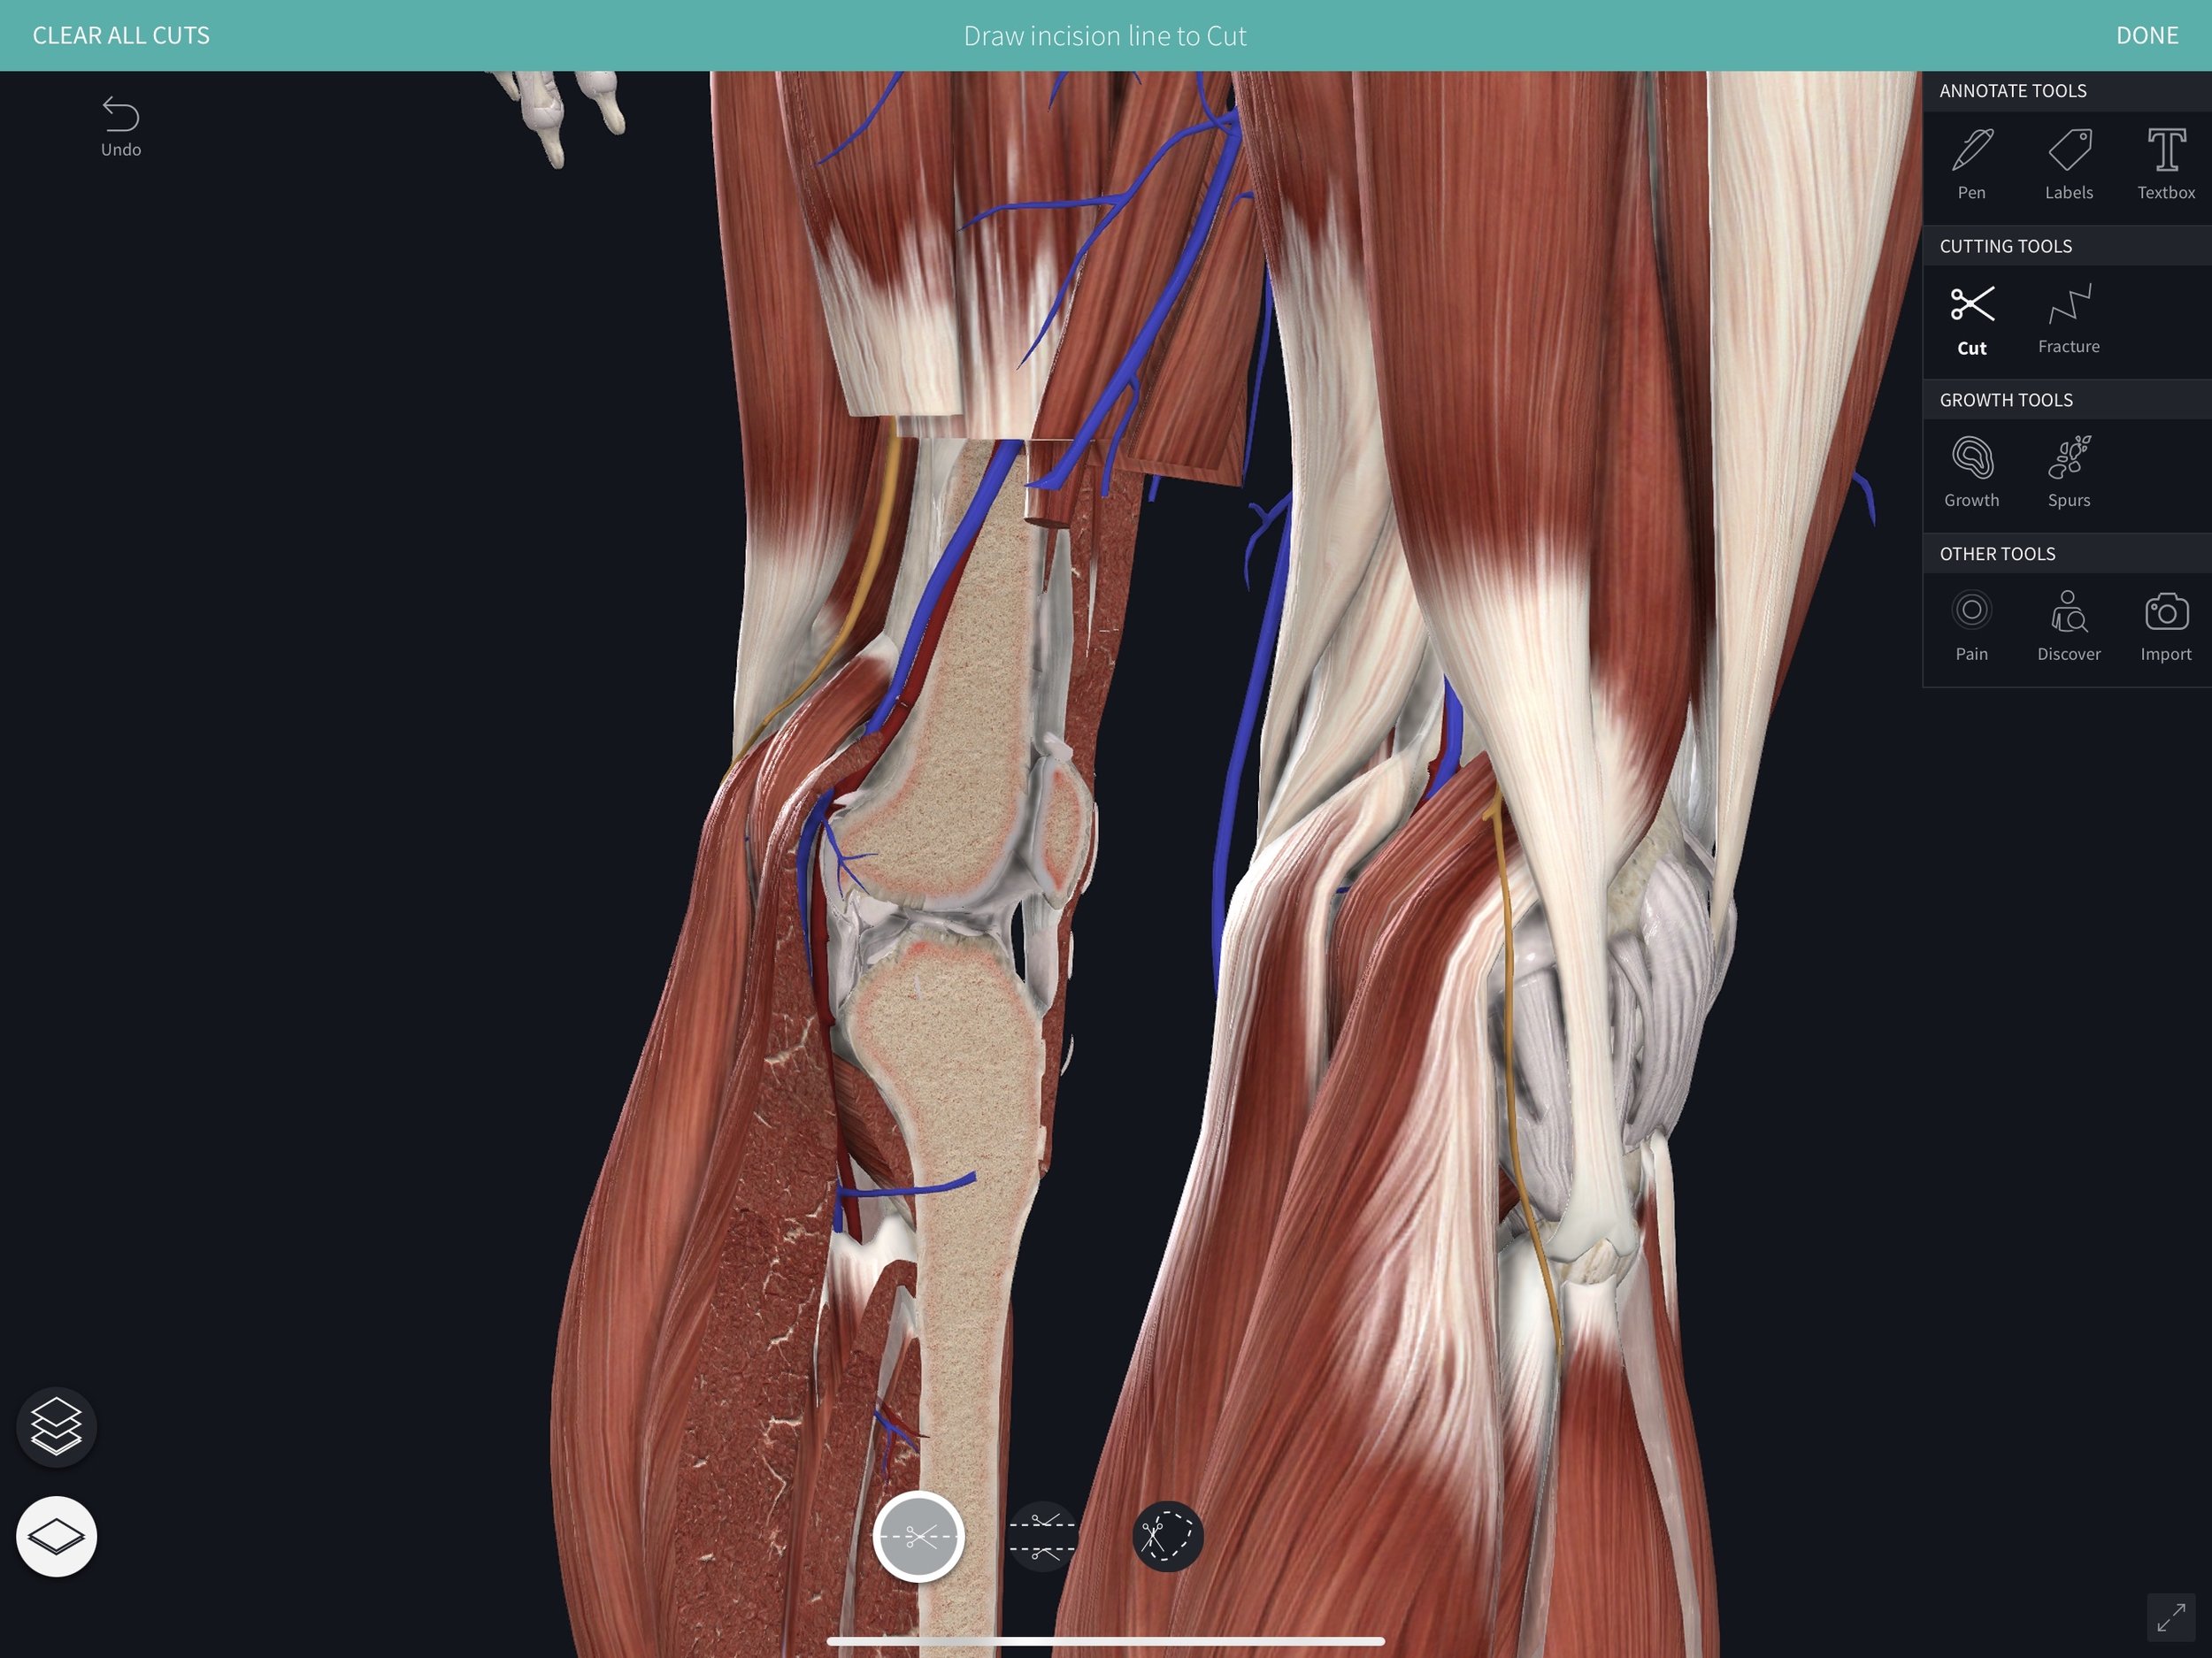
In this initial planning stage, I extensively used Complete Anatomy 3D4 (Elsevier), a cloud-based education application that allows users to investigate the minute details of human anatomy in 3D. A great advantage of this app is that it allowed me to experiment with different sections of cut (structures can be cut individually or as a group) in order to figure out what I wanted to portray in the final illustration. I was able to extensively study the major muscle placement, nerves, and vasculature, all while cutting some structures and leaving others intact.
Preliminary Planning


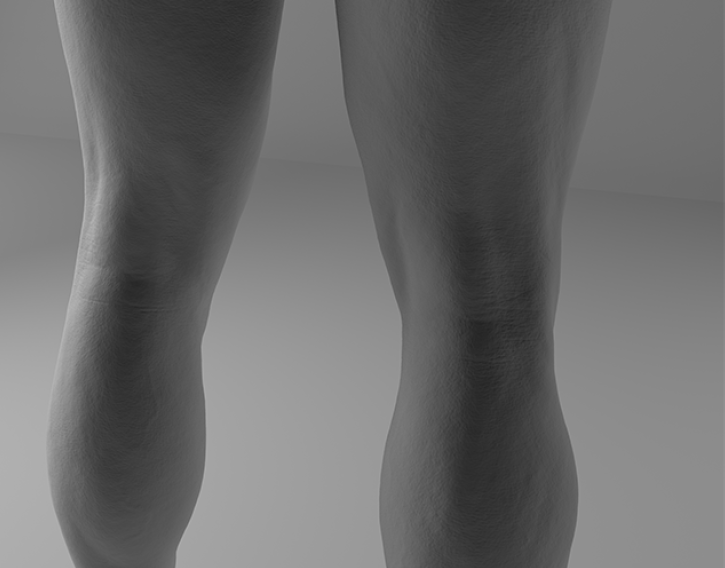
To figure out the initial angle of the cut and the depth of each plane, I made a simple maquette using the SuperAverageMan tool preset in ZBrush. I used this first iteration of the maquette as the base for all of my subsequent sketches.
I continued working on this base, adding more surface details such as skin texture and muscle definition based mainly on Grant’s atlas references. I exported the .obj file into Maya and set up the scene using upper left hand lighting and subtle backlighting.
I decided I wanted to use a 3D base for the final rendering since it would allow me to take advantage of Maya’s lighting capabilities to highlight the texture of the skin without having to render it by hand. This also made it easy to make changes to the view angle I wanted for the drawing since all I had to do was rotate the model and redo the render.
Building a Maquette


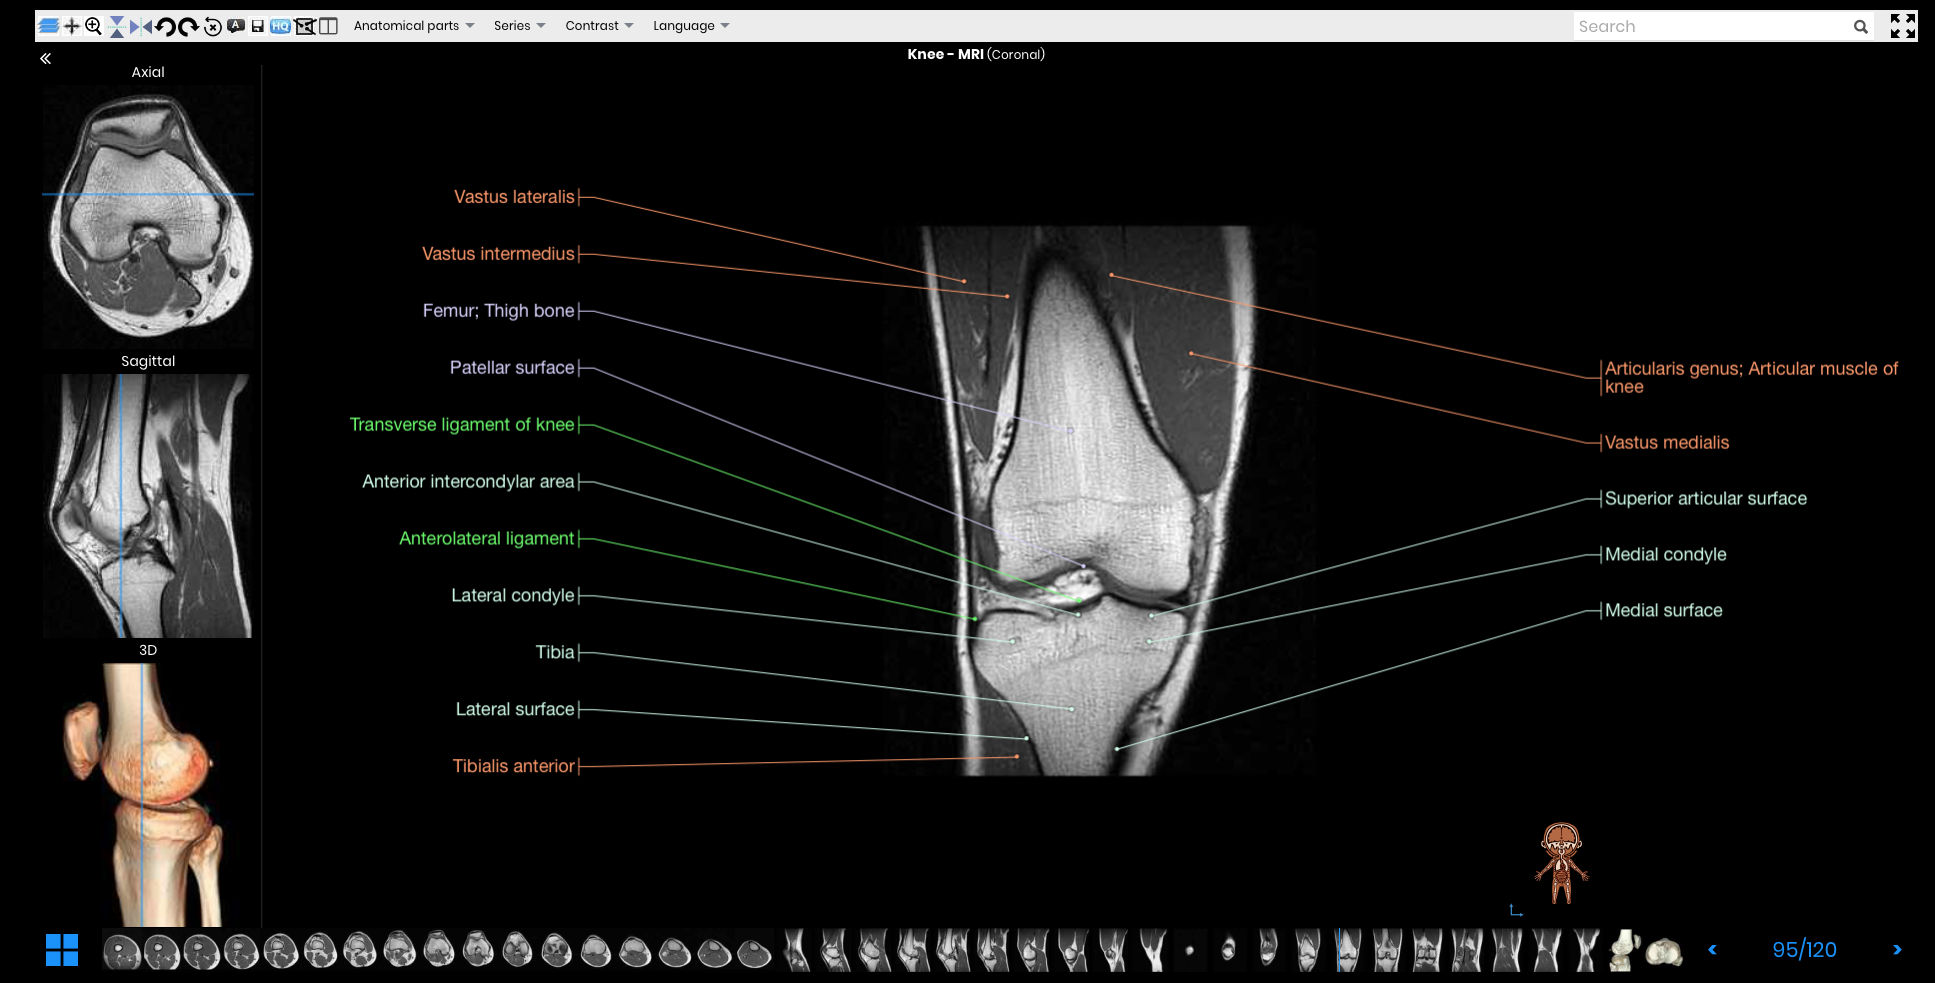
Reference MRI sections were obtained from IMAIOS, a medical imaging company which provides access to a complete human anatomy atlas for radiologists and healthcare professionals.
I used these MRI scans extensively throughout my illustration process. I based my initial sketch on the compiled view of the coronal, sagittal and axial slices that matched the angle of cut I wanted. The labels made it very helpful to cross-check the correct placement of anatomical landmarks with other reference materials.
Reference Gathering


Special thanks to Prof. Dave Mazierski for graciously providing 99 screen captures of the slices!
For the axial cross-section, I found these scans from Anson’s Atlas of Human Anatomy extremely helpful as they allowed me to choose the height at which I wanted my slice to be. For my illustration, I opted to go with a section labeled as “94” in the image shown below as I felt it offered a good view of the muscles I wanted to show.
I cross-referenced several anatomical atlases for muscle placement, vasculature, color choices, and material textures. I found that most of the sagittal view cuts were directly through the patella, which does not match my chosen section of cut. Thus, I mainly used the sagittal sections shown here as a style guide and not as anatomy references. Thieme and Grant’s atlases were used extensively for their sagittal and coronal view images, while Anson scans were used to visualize the axial sections.
The coronal cross-section from Grant’s Atlas, 14th ed. (bottom left) was particularly helpful for visualizing the cruciate ligaments and menisci in my illustration.
I consulted a photographic atlas (Rohen,8th ed.) to confirm the location of the major vasculature (especially the great and small saphenous veins), as well as the thickness of the muscles with relation to each other.
PROCESS WORK
PRODUCTION
This is the revised final sketch I used for my final illustration after consulting with Anne Agur and correcting the angle of the cut. The corrections I made were with regards to making sure the entirety of the tibia and fibula would be seen in the coronal section of the cut (previously, the depth of the cut in my sketch had been incorrect).
I also decided to opt for a cleaner blunt cut of the sketch across all planes (previously, I had hanging muscles and vasculature/nerves at the superior end of the cut).
Refined Sketch

I took my sketch into Adobe Illustrator to block in the basic shapes of the bones, muscles, vasculature, nerves, and connective tissue. I did the final rendering (greyscale and color) in Adobe Photoshop.
I used the scans from the Anson atlas, as well as Grant’s atlas, as my main style reference. For the coronal and sagittal sections of cut, I used the same mixer brush as in my previous tonal render project. A soft airbrush was used to create the major shadows and shading of the cortical bone margins.
RenderING
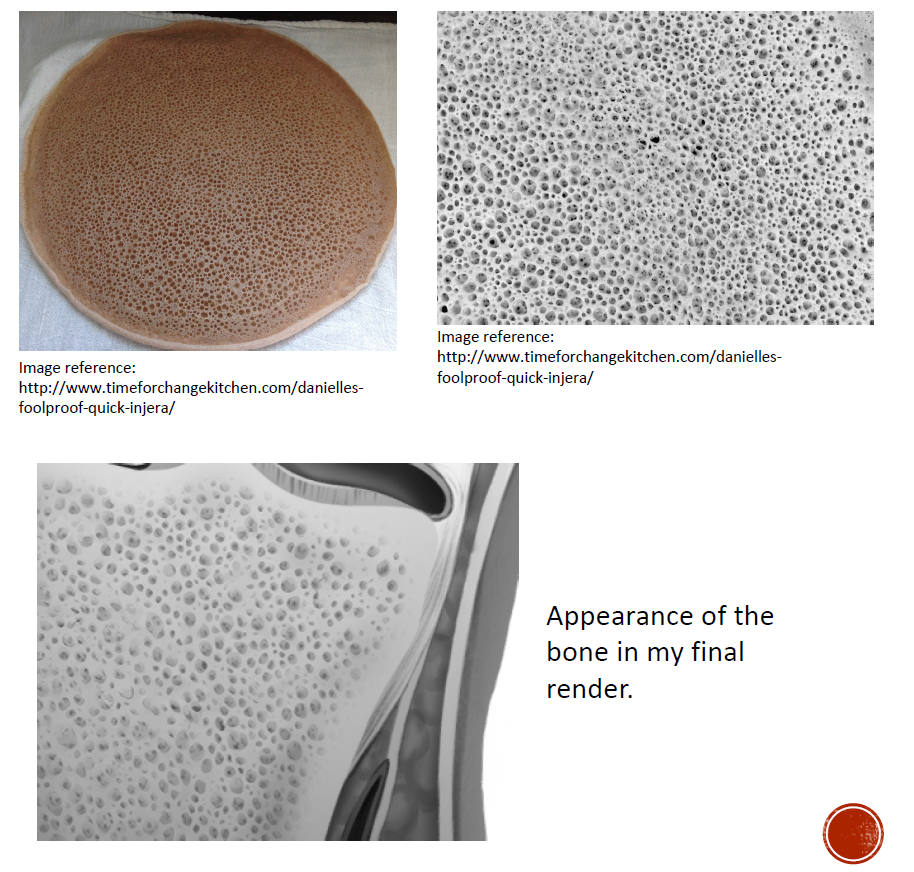
To create the spongy bone texture, I took inspiration from an Ethiopian bread called injera. I first read about the similarity in matrix texture between this food and bone in a medical illustration blog post.
I used the scan provided by David Ehlert of Cognition Studio as the basis for my texture. I first took the scan through a pass of TopazClean (Photoshop plugin) to remove noise and give it a more painterly appearance. I then painted over the texture to hide some of the black spots seen in the original photos and make it closer in appearance to actual bone texture.
I edited the levels and contrast of the image and fitted it into the shape of my sketch by using the Warp tool and erasing along the edges with an airbrush.